VMware Fusionの仮想マシン上でKVMなどの仮想環境をネストして利用する設定 (Nested Virtualization )

VMware FusionではmacOS上で仮想マシンを動作させることができる。その仮想マシン上でさらにネストしてKVMなどの仮想環境を動かす(Nested Virtualization)には、仮想マシンの設定を変更して「Intel VT-x」という仮想化ハードウェア拡張を有効にする必要がある。

現在利用している仮想マシンでIntel VT-xが有効になっているかどうかはcpuinfovmxが含まれるかどうかで確認できる。

grep vmx /proc/cpuinfo

grepを実行しても何も表示されない場合は、Intel VT-xが有効になっていないということになる。

たとえば、virsh define実行時には次の様なエラーが発生した。

# virsh define ubuntu16.xml
error: Failed to define domain from ubuntu16.xml
error: invalid argument: could not find capabilities for arch=x86_64 domaintype=kvm

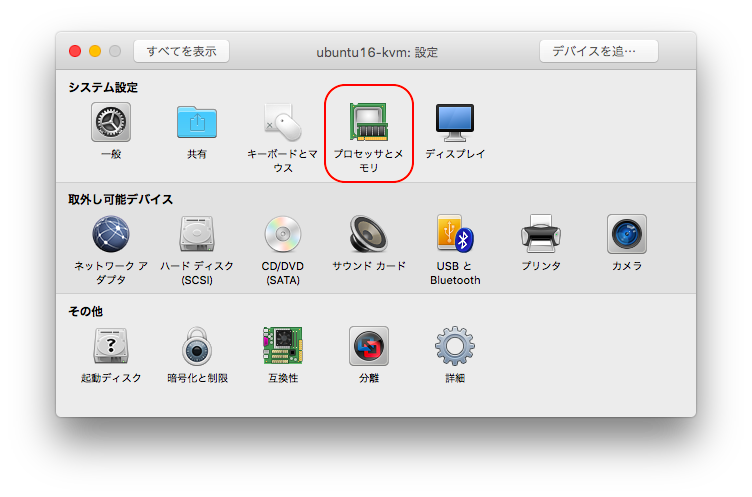
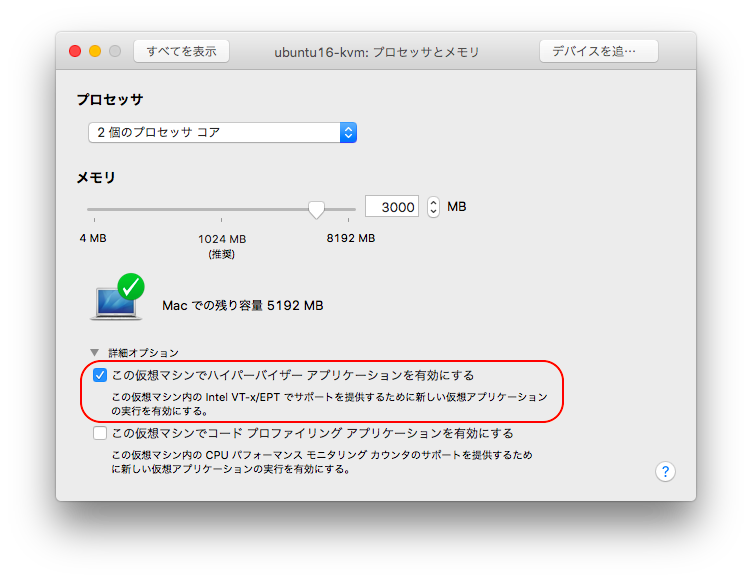
VMware Fusionの設定画面でIntel VT-xを有効にするには、仮想マシンをシャットダウンした状態で仮想マシンの「設定 -> プロセッサとメモリ」を開き。

「詳細オプション」にある「この仮想マシンでハイパーバイザー アプリケーションを有効にする」にチェックをつける。

この設定をした後、仮想マシンを起動して先ほどのgrepコマンドを実行すると、Intel VT-xが有効になっていることを確認できる。

grep vmx /proc/cpuinfo
flags		: fpu vme de pse tsc msr pae mce cx8 apic sep mtrr pge mca cmov pat pse36 clflush dts mmx fxsr sse sse2 ss syscall nx pdpe1gb rdtscp lm constant_tsc arch_perfmon pebs bts nopl xtopology tsc_reliable nonstop_tsc aperfmperf pni pclmulqdq vmx ssse3 fma cx16 pcid sse4_1 sse4_2 x2apic movbe popcnt aes xsave avx f16c rdrand hypervisor lahf_lm epb tpr_shadow vnmi ept vpid fsgsbase smep dtherm ida arat 

VirtualBoxでもKVMの準仮想化機能などを利用する場合にはこの設定が必要となる。

VMware Fusionの設定ファイルであるvmxファイルにおいては、vhv.enableTRUE値を設定する行を追加すればよい。

vhv.enable = "TRUE"

Vagrantでvmware_fusionのproviderを使用している場合は、例えばVagrantfileに次の様に記述すれば、vagrant upでIntel VT-xを有効化した仮想マシンを起動することができるようになる。

Vagrant.configure("2") do |config|
  config.vm.box = "bento/ubuntu-16.04"
  config.vm.provider :vmware_fusion do |vmware|
    vmware.vmx["vhv.enable"] = "TRUE"
  end
end

VagrantのアップグレードでVMware providerエラー

最近は主にAnsibleのテスト環境用にVagrantを使用している。Virtual Boxは重い印象があるのでVMにはVMware Fusionを利用している。

playbookの記述が出来上がってくるとそれほど使う機会もないので、Vagrantのアップグレードとか頭になかったので全然してなかった。
バージョンを調べてみたら当然のことながら新しいバージョンがリリースされていたのでアップグレードしてみたところ、次のようなエラーで動かなくなってしまった。

$ vagrant init
An unexpected error occurred while loading the Vagrant VMware
provider. Please contact support with the following
error code: '7'.
Vagrant failed to initialize at a very early stage:

The plugins failed to load properly. The error message given is
shown below.

exit

VMware Fusionをproviderとして使用するプラグインもアップデートが必要なのかと思って、vagrant plugin updateを実行してみたが何も変わらない。

An unexpected error occurred while loading the Vagrant VMware provider · Issue #3299 · mitchellh/vagrant

プラグインのアップデートもないのもおかしいなと思って調べてみたところ、githubのissueが見つかり、そのコメントに「一度バージョンを戻してプラグインをアップデートした後、再度Vagrantをアップグレードすると動くよ」というのが見つかったので、その通りにすると動作するようになった。

今回はバージョン1.7.4から1.8.6にアップグレードしたので、以前のバージョンも配布しているURLから古い方のバージョンである1.7.4のパッケージをダウンロードしてダウングレードを実行。

Vagrant Versions | HashiCorp Releases

vagrant plugin updateを実行してプラグインをアップデートする。今度はちゃんとアップデートができた。

$ vagrant plugin update

Updating installed plugins...
Updated 'vagrant-share' to version '1.1.5'!
Updated 'vagrant-vmware-fusion' to version '4.0.12'!

この状態で再度Vagrantのバージョンを1.8.6をインストールすることで、無事アップグレードが完了した。

$ vagrant -v
Vagrant 1.8.6

$ vagrant init
A `Vagrantfile` has been placed in this directory. You are now
ready to `vagrant up` your first virtual environment! Please read
the comments in the Vagrantfile as well as documentation on
`vagrantup.com` for more information on using Vagrant.